EN
EN
 AR
AR BG
BG HR
HR CS
CS DA
DA NL
NL FI
FI FR
FR DE
DE EL
EL HI
HI IT
IT JA
JA KO
KO NO
NO PL
PL PT
PT RO
RO RU
RU ES
ES SV
SV IW
IW ID
ID LV
LV LT
LT SR
SR VI
VI SQ
SQ ET
ET HU
HU TH
TH TR
TR FA
FA MS
MS
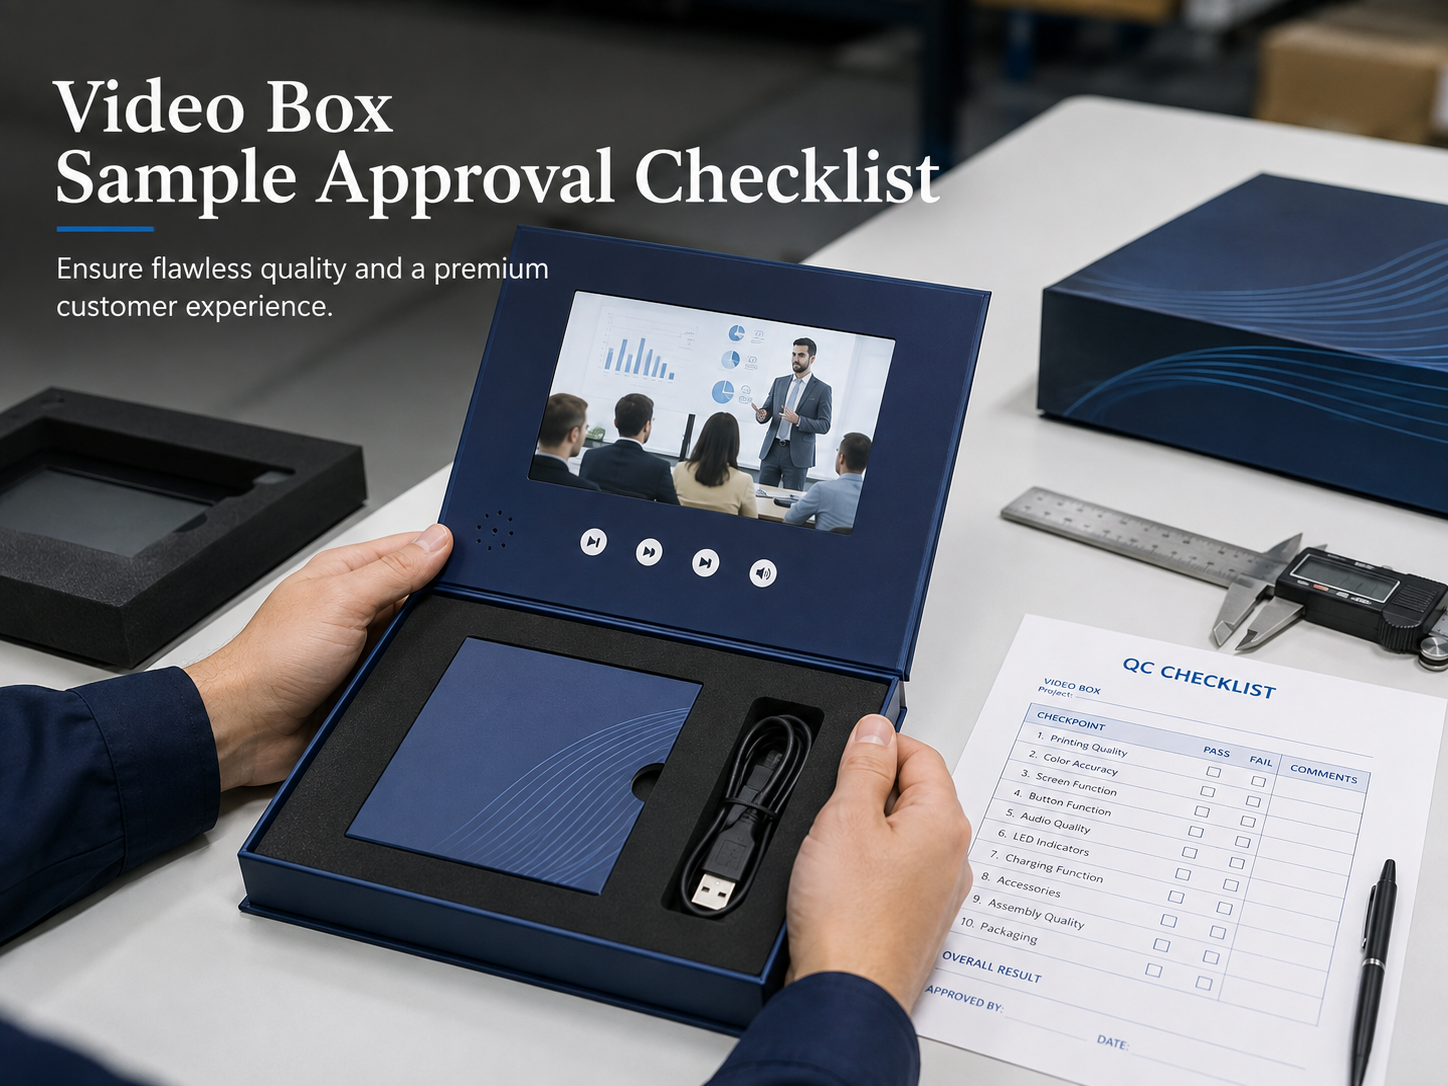
What to Test Before Approving a Custom Video Box Sample
A custom video box sample should never be approved based on appearance alone.
A finished sample combines packaging structure, printing, an LCD screen, electronic components, video content, buttons, audio, battery power and product inserts. A problem in any one of these areas can become much more expensive to correct after mass production begins.
For Procurement Managers, Product Managers and Packaging Managers, a structured video box sample approval checklist helps turn sample approval into a practical quality-control step rather than a visual judgment.
1. Confim the External Dimensions
Start with the basic structure.
Check the finished box against the approved dimensions and confirm:
- Length, width and height
- Lid and base alignment
- Panel thickness
- Corners and edges
- Opening clearance
- Overall shape after closing
If the video box will hold a product, the external dimensions should also be reviewed together with the internal packaging arrangement.
A box that looks correct when empty may behave differently once the product, insert and electronic components are installed.
2. Check the Product Insert and Fit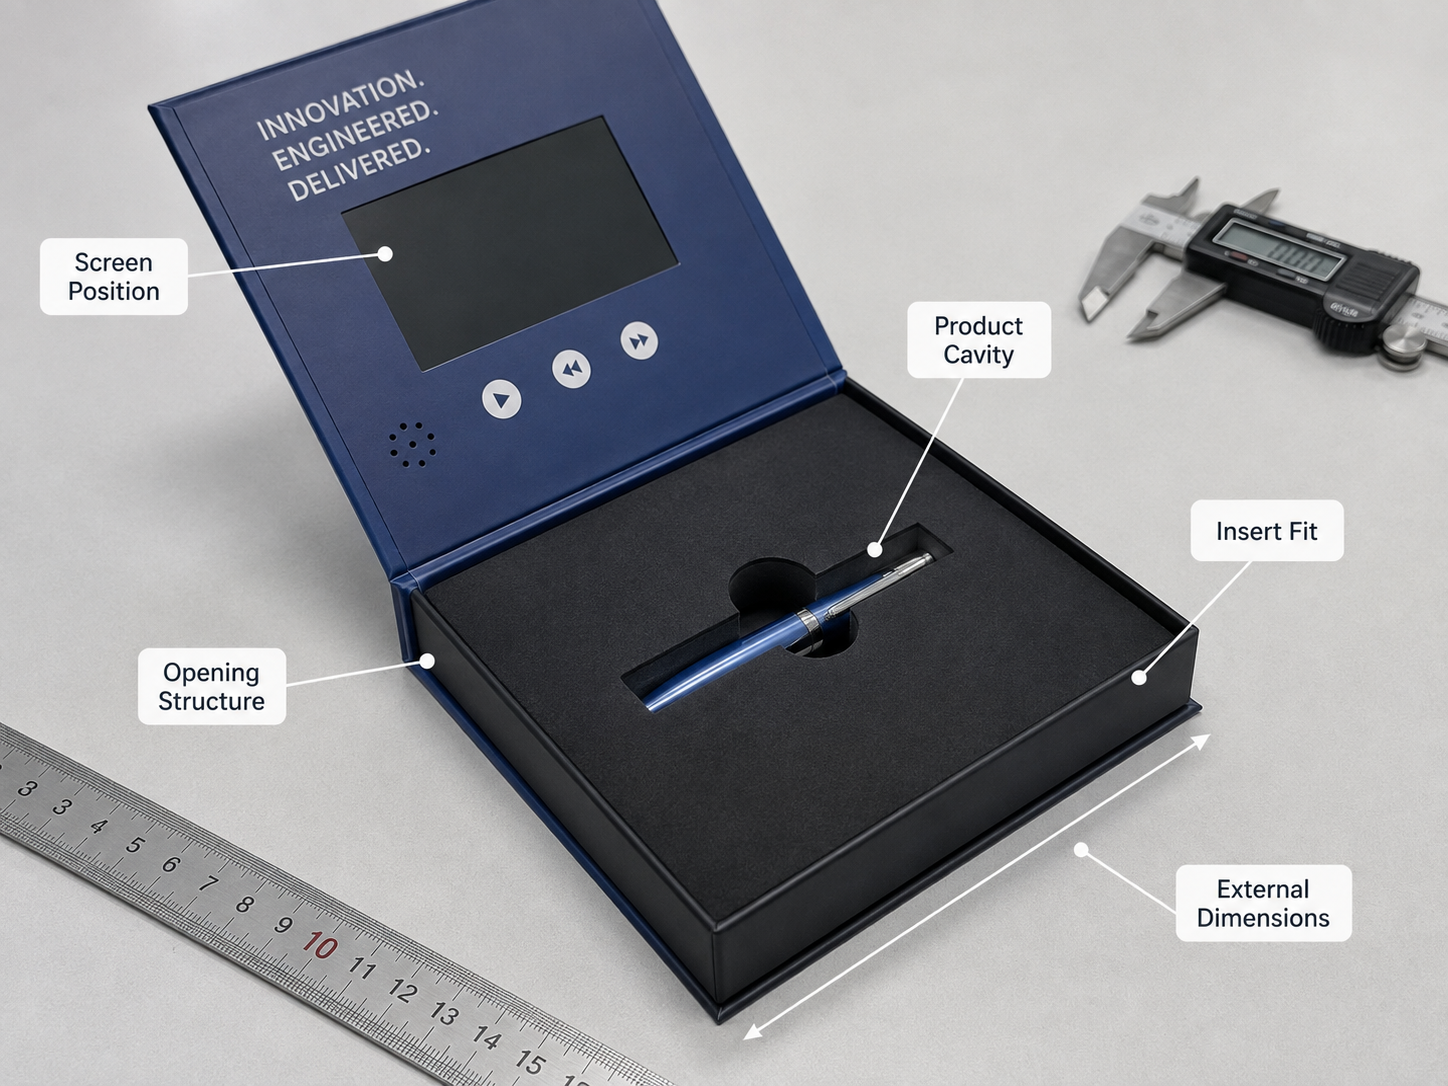
The insert should hold the product securely without making removal difficult.
Check:
- Product cavity size
- Product depth
- Clearance around the product
- Insert alignment
- Product movement when the box is handled
- Accessibility when removing the product
- Space between the insert and electronic components
Depending on the project, video boxes may use different structures and materials, including paperboard-based boxes, PU-covered structures and customized inserts.
The correct insert should protect the product while maintaining a clean presentation.
3. Test the Opening and Closing Structure
Open and close the sample repeatedly.
Pay attention to:
- Hinge movement
- Lid alignment
- Magnetic closure where applicable
- Resistance during opening
- Gaps after closing
- Structural movement or deformation
- Any interference between the lid, screen and insert
For premium presentation boxes, the opening experience is part of the product design. It should feel controlled and consistent rather than loose or difficult to operate.
4. Verify Screen Position and Viewing Angle
The screen should be checked in the actual viewing position, not only while the box is lying flat.
Confirm:
- Screen alignment
- Screen orientation
- Distance from surrounding edges
- Viewing angle after opening
- Visibility of subtitles and small details
- Whether printed graphics interfere visually with the display
Screen placement should work together with the box structure and printed layout.
A larger screen does not automatically create a better presentation if the viewing angle or surrounding layout is poorly planned.
5. Test Open-to-Play Functionality
If the selected configuration uses automatic playback when the box is opened, test the trigger repeatedly.
Check whether:
- The video starts consistently when opened
- Playback begins at the expected point
- Closing the box produces the intended response
- Reopening activates the expected playback logic
- The trigger works at different opening angles
Automatic opening triggers or magnetic switches are available on certain configurations, but the exact function should always be confirmed for the specific model.
6. Test Every Button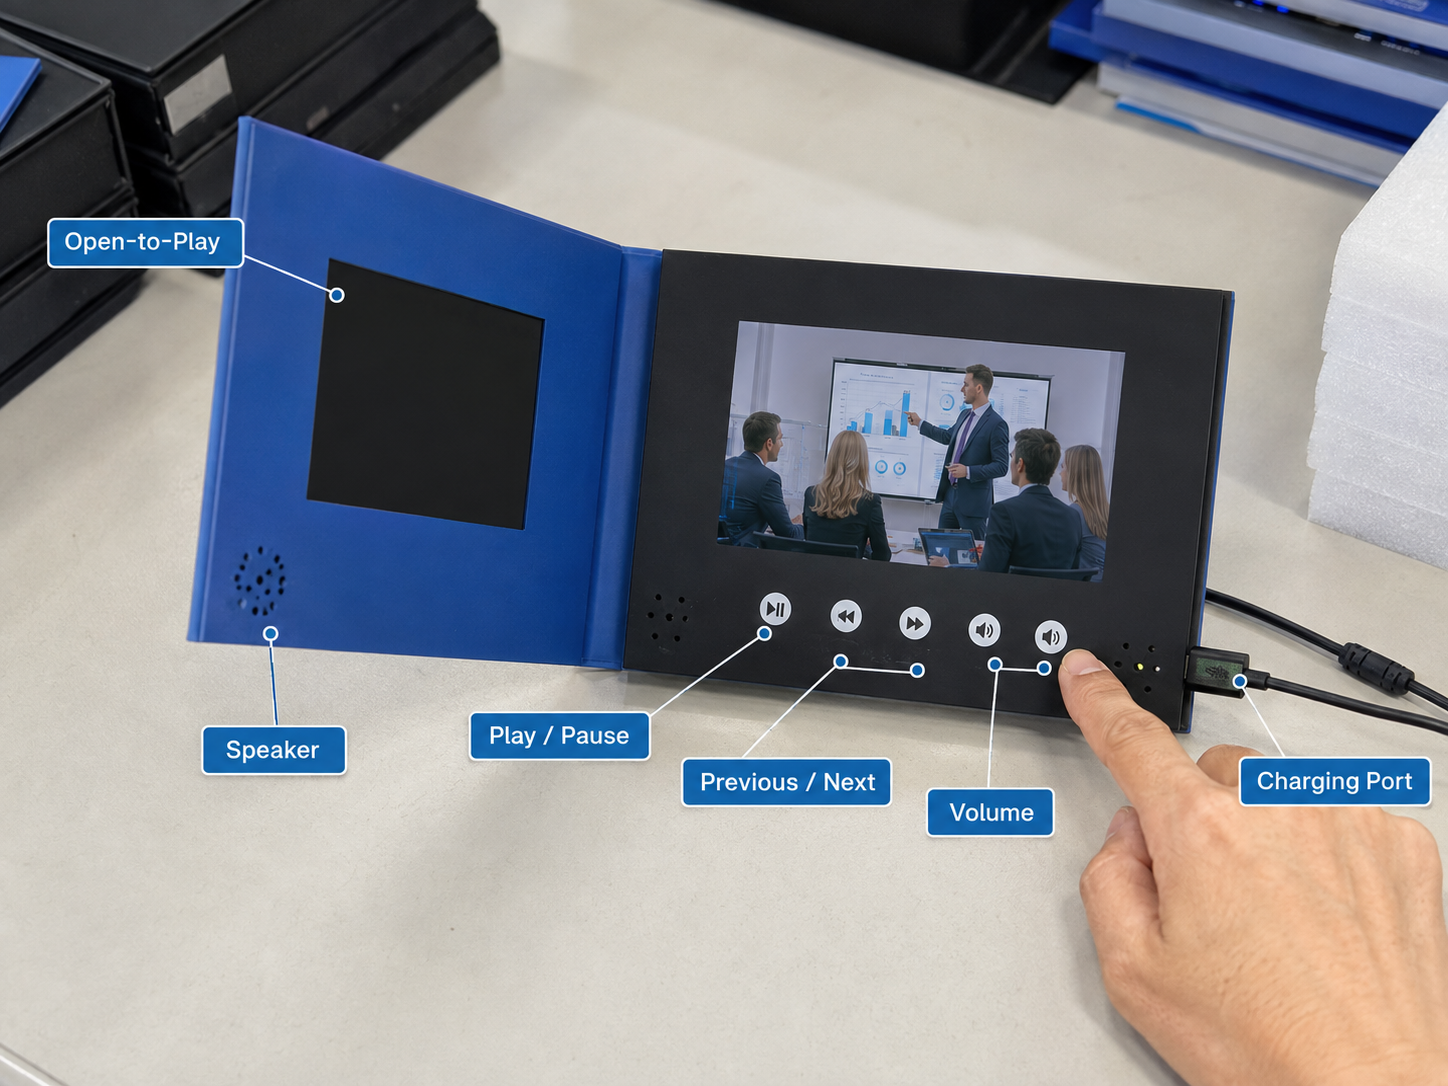
Never assume that buttons are correct because the video plays.
Press every button individually and several times.
Depending on the approved configuration, functions may include:
- Play / Pause
- Previous video
- Next video
- Volume up
- Volume down
- Individual video selection
Check the printed button icons as well as their actual functions.
The button marked for volume control, for example, must perform the correct command. This is especially important when multiple videos or customized controls are included.
7. Review the Final Video Files
The sample should contain the actual or final-approved content whenever possible.
Check:
- Correct video files
- Playback order
- Video orientation
- Image quality
- Subtitle readability
- Audio synchronization
- Start and end points
- Transition between multiple videos
Also test the content from beginning to end rather than watching only the first few seconds.
If content will be updated before production, confirm the final file-loading process and approved version before mass production.
8. Check Audio Quality and Volume
Audio should be evaluated with the box fully assembled because the structure can affect how the speaker sounds.
Listen for:
- Clear speech
- Suitable volume range
- Distortion
- Buzzing or vibration
- Consistent sound between videos
- Speaker openings being unobstructed
Test both the lowest and highest useful volume levels.
If the box contains an insert or product close to the speaker area, confirm that it does not block or noticeably change the sound.
9. Test Battery and Charging
Battery performance should be checked according to the final screen, audio and playback configuration.
At the sample stage, verify:
- Charging connection
- Charging stability
- Power-on behavior
- Playback while adequately charged
- Battery installation
- Charging-port position
- Cable accessibility
Valsen video products can use different battery capacities, memory configurations and charging arrangements depending on the model, so these specifications should be approved for the actual project rather than assumed across the entire range.
10. Review Printing Color and Logo Finish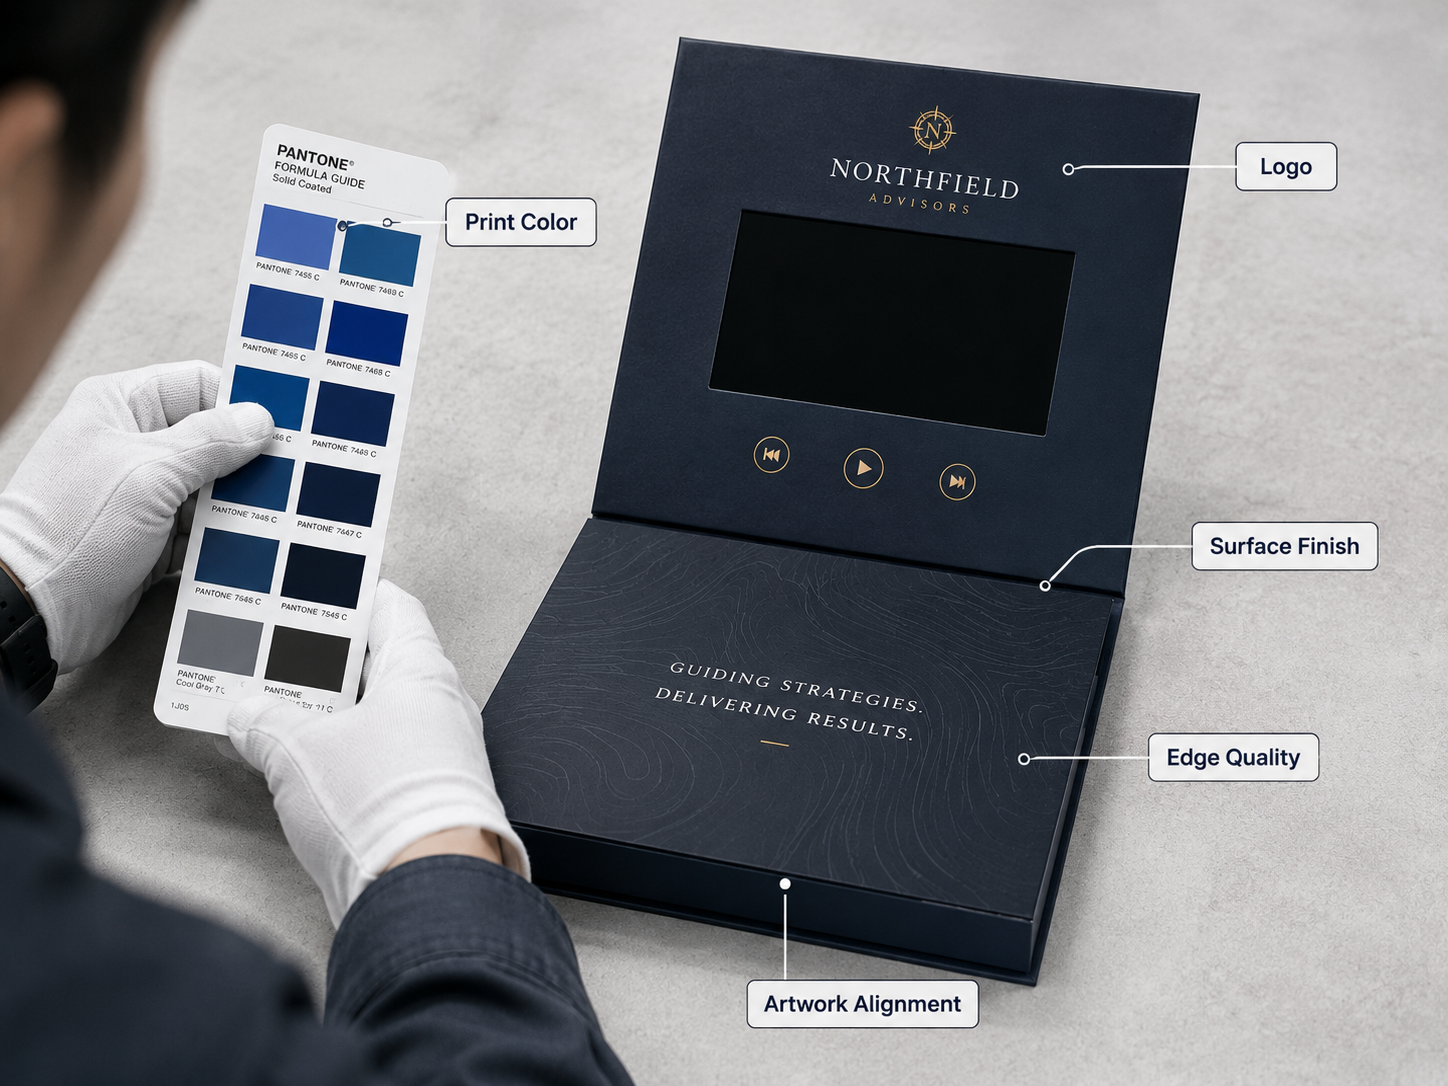
Electronic functions can be perfect while the packaging still fails brand approval.
Compare the sample against the approved artwork and color references.
Check:
- Printed color
- Logo position
- Logo size
- Artwork alignment
- Text clarity
- Registration
- Surface consistency
If a special logo or finishing process is used, evaluate it under normal lighting and from different angles.
The objective is not only accurate printing but consistency between the printed packaging, screen area and overall product presentation.
11. Inspect the Surface Finish
Look closely at all visible surfaces.
Check for:
- Scratches
- Glue marks
- Bubbles
- Wrinkles
- Uneven edges
- Surface contamination
- Damaged corners
- Visible assembly marks
Pay particular attention to areas around the screen, buttons, hinge and charging port, where packaging and electronic assembly meet.
These transition areas often reveal issues that are not visible in artwork proofs.
12. Check Assembly Stability
Gently handle the sample as it would be handled by the final recipient.
Confirm that:
- The screen remains secure
- Buttons do not move
- The speaker is fixed
- The insert stays in position
- Internal components do not rattle
- Cables are not exposed
- The structure remains aligned
A video box is a combination of packaging and electronics, so both systems need to remain stable after final assembly.
13. Review Packaging Protection
The video box sample itself may also require protective packaging for transport.
Check whether the shipping package protects:
- Box corners
- Printed surfaces
- Screen
- Charging accessories
- Product inside the insert
- Outer presentation finish
For projects shipped internationally or distributed to different locations, protective packaging should be evaluated before production rather than added as an afterthought.
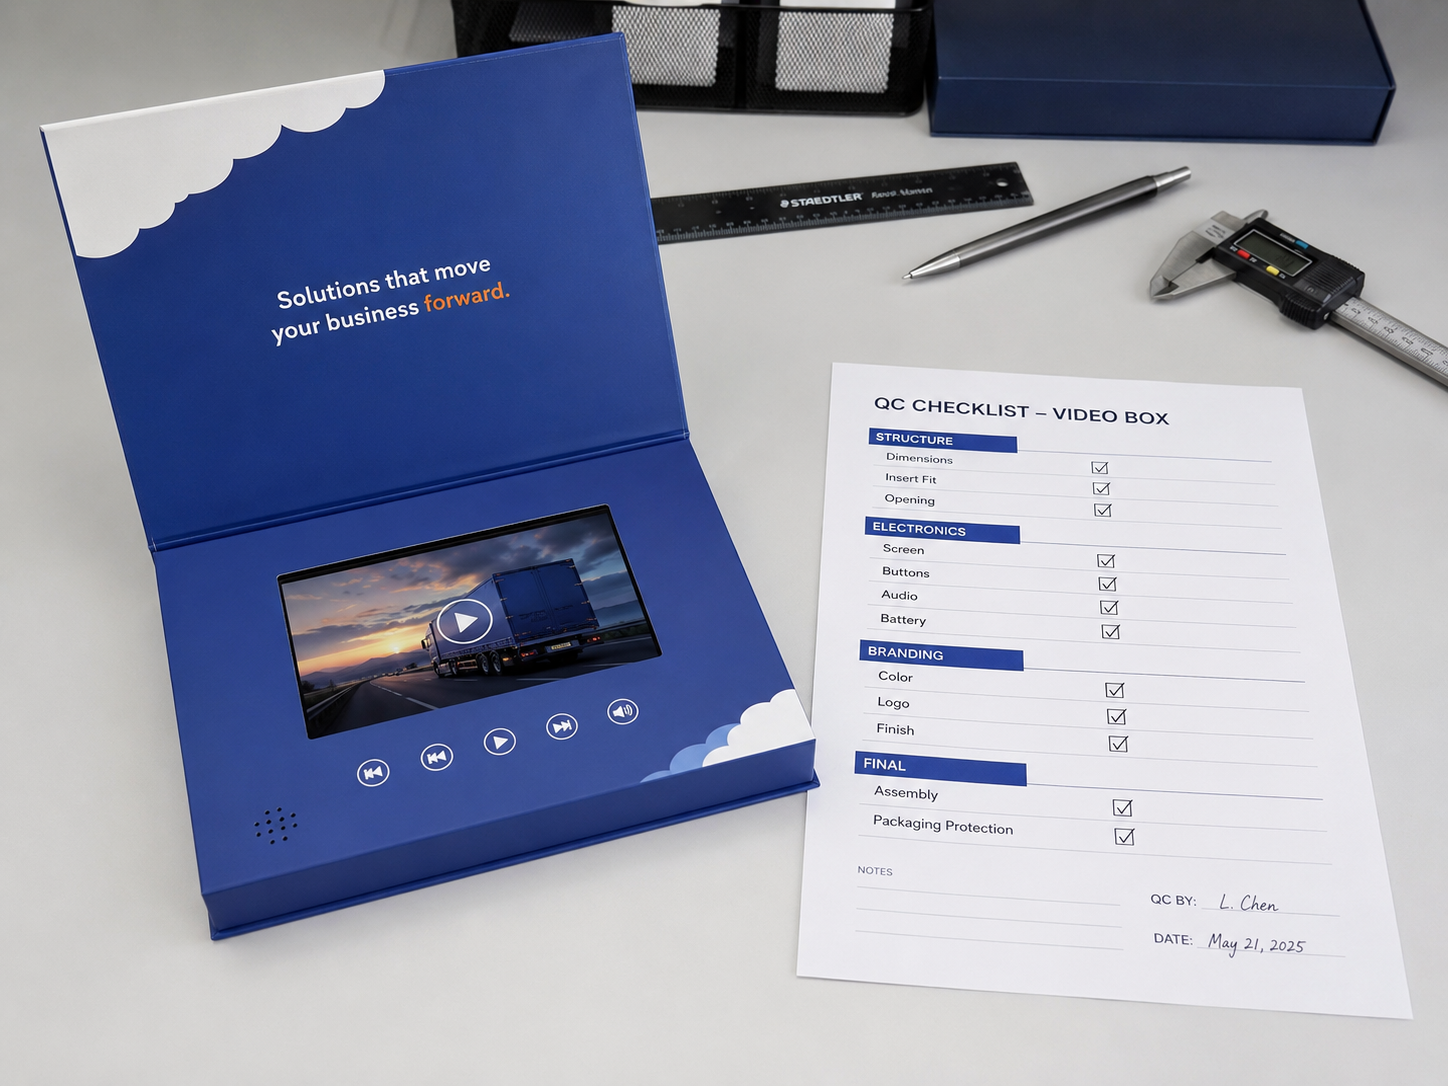 Video Box Sample Approval Checklist
Before approving mass production, confirm:
External dimensions match the approved specification
Product cavity and insert fit correctly
Opening and closing structure operates smoothly
Screen position and viewing angle are correct
Open-to-play function works consistently if specified
Every button performs the correct function
Correct video files and playback order are loaded
Audio is clear and volume controls work
Battery and charging function correctly
Printing colors match the approved reference
Logo position and finishing are correct
Surface finish is clean and consistent
Screen, insert and electronic parts are securely assembled
Protective packaging is suitable for transport
Final Recommendation
A custom video box sample is not simply a visual prototype. It is the final opportunity to verify packaging, electronics, content and user interaction together before mass production.
The best approval process checks the complete experience: how the box opens, how the product fits, how the video starts, how the buttons respond, how the audio sounds and how the finished unit will survive packing and delivery.
Request a sample review checklist before confirming your video box production specifications.
FAQ
What should I check first when receiving a custom video box sample?
Start with the approved dimensions, box structure and product insert. Then test the screen, playback, buttons, audio, battery and printing systematically.
Should I test the video box more than once?
Yes. Opening triggers, buttons, playback and mechanical structures should be tested repeatedly rather than approved after a single successful operation.
Should the final video files be loaded before sample approval?
Whenever possible, yes. Testing the intended content helps verify playback order, subtitle readability, audio and overall user experience.
Why should packaging protection be reviewed during sampling?
The finished video box contains both printed surfaces and electronic components. Protective packaging should reduce the risk of cosmetic or functional damage during transport.
Table of Contents
- 1. Confim the External Dimensions
- 2. Check the Product Insert and Fit
- 3. Test the Opening and Closing Structure
- 4. Verify Screen Position and Viewing Angle
- 5. Test Open-to-Play Functionality
- 6. Test Every Button
- 7. Review the Final Video Files
- 8. Check Audio Quality and Volume
- 9. Test Battery and Charging
- 10. Review Printing Color and Logo Finish
- 11. Inspect the Surface Finish
- 12. Check Assembly Stability
- 13. Review Packaging Protection
- Video Box Sample Approval Checklist
- Final Recommendation
- FAQ