EN
EN
 AR
AR BG
BG HR
HR CS
CS DA
DA NL
NL FI
FI FR
FR DE
DE EL
EL HI
HI IT
IT JA
JA KO
KO NO
NO PL
PL PT
PT RO
RO RU
RU ES
ES SV
SV IW
IW ID
ID LV
LV LT
LT SR
SR VI
VI SQ
SQ ET
ET HU
HU TH
TH TR
TR FA
FA MS
MS
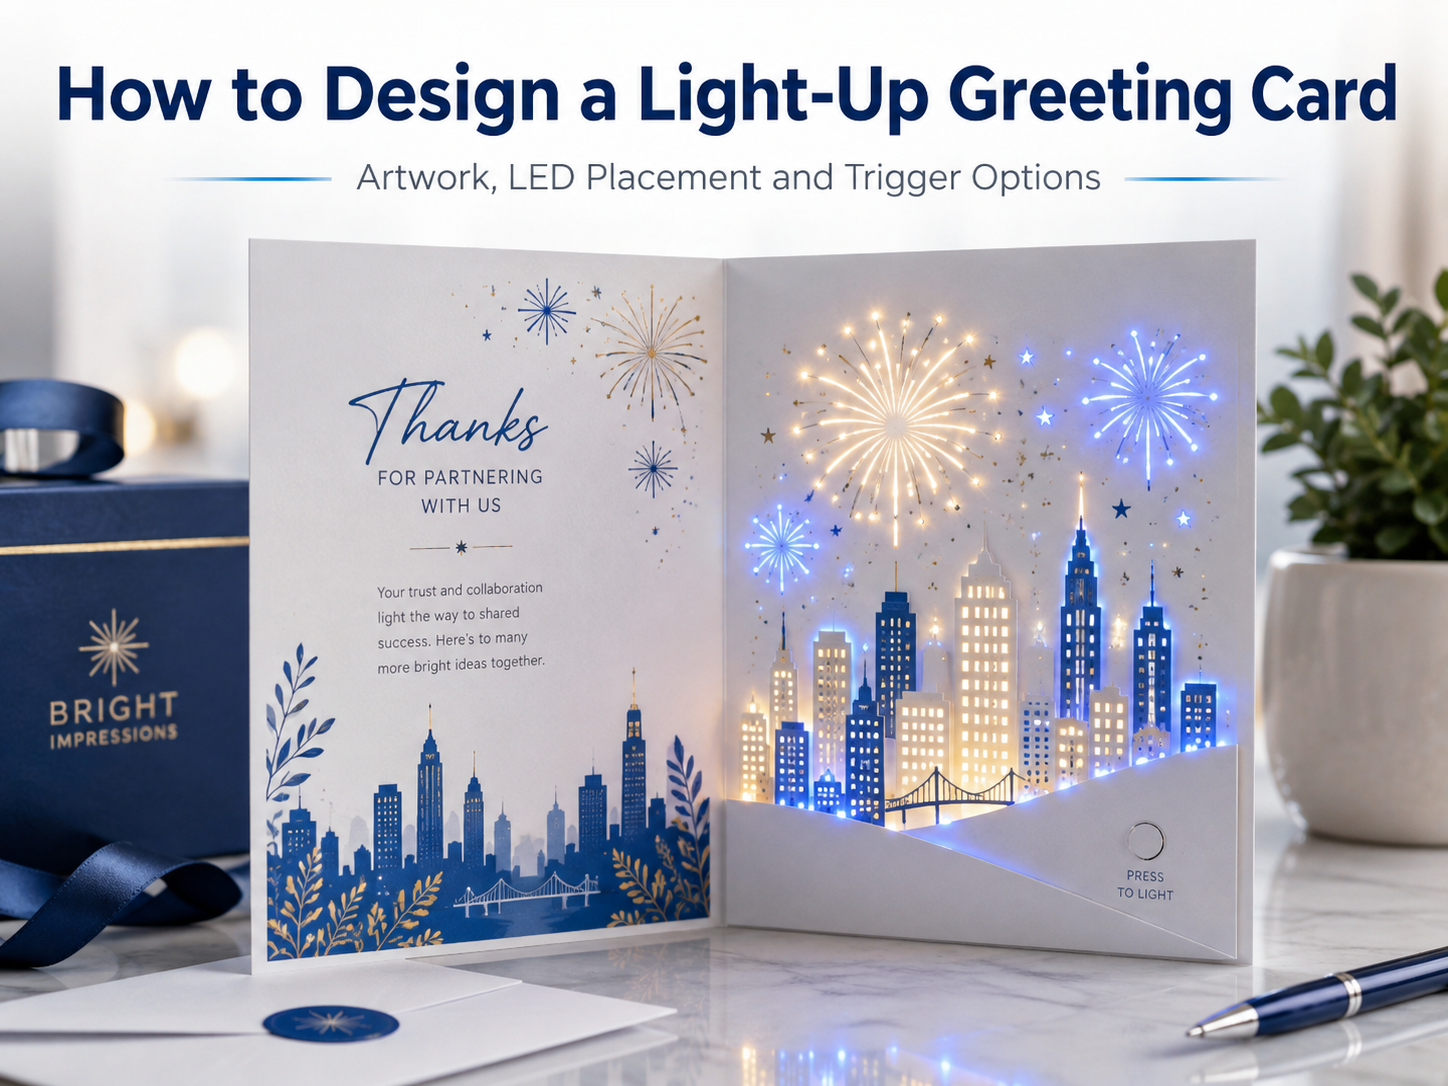
How to Design a Light-Up Greeting Card: Artwork, LED Placement and Trigger Options
A successful custom light up greeting card design starts with more than adding LEDs behind printed artwork.
The visual design, LED position, trigger method, battery space and internal card structure need to be planned together. If these elements are confirmed too late, the final card may have uneven lighting, visible components or a trigger that does not match the intended user experience.
For greeting card companies, creative agencies and brand marketing teams, the best approach is to treat the lighting system as part of the artwork from the beginning.
Start with the Visual Focus
Before deciding where to place LEDs, identify the part of the artwork that should attract attention first.
Good LED positions usually support important visual elements such as:
- Stars
- Candles
- Fireworks
- Logos
- Product outlines
- Windows or building lights
- Decorative patterns
- Key message areas
The purpose of the LEDs is not to illuminate every part of the card. A few well-placed light points often create a cleaner and more controlled effect than adding too many lights.
For brand campaigns, the lighting should reinforce the main message rather than compete with the artwork.
Match LED Placement to the Artwork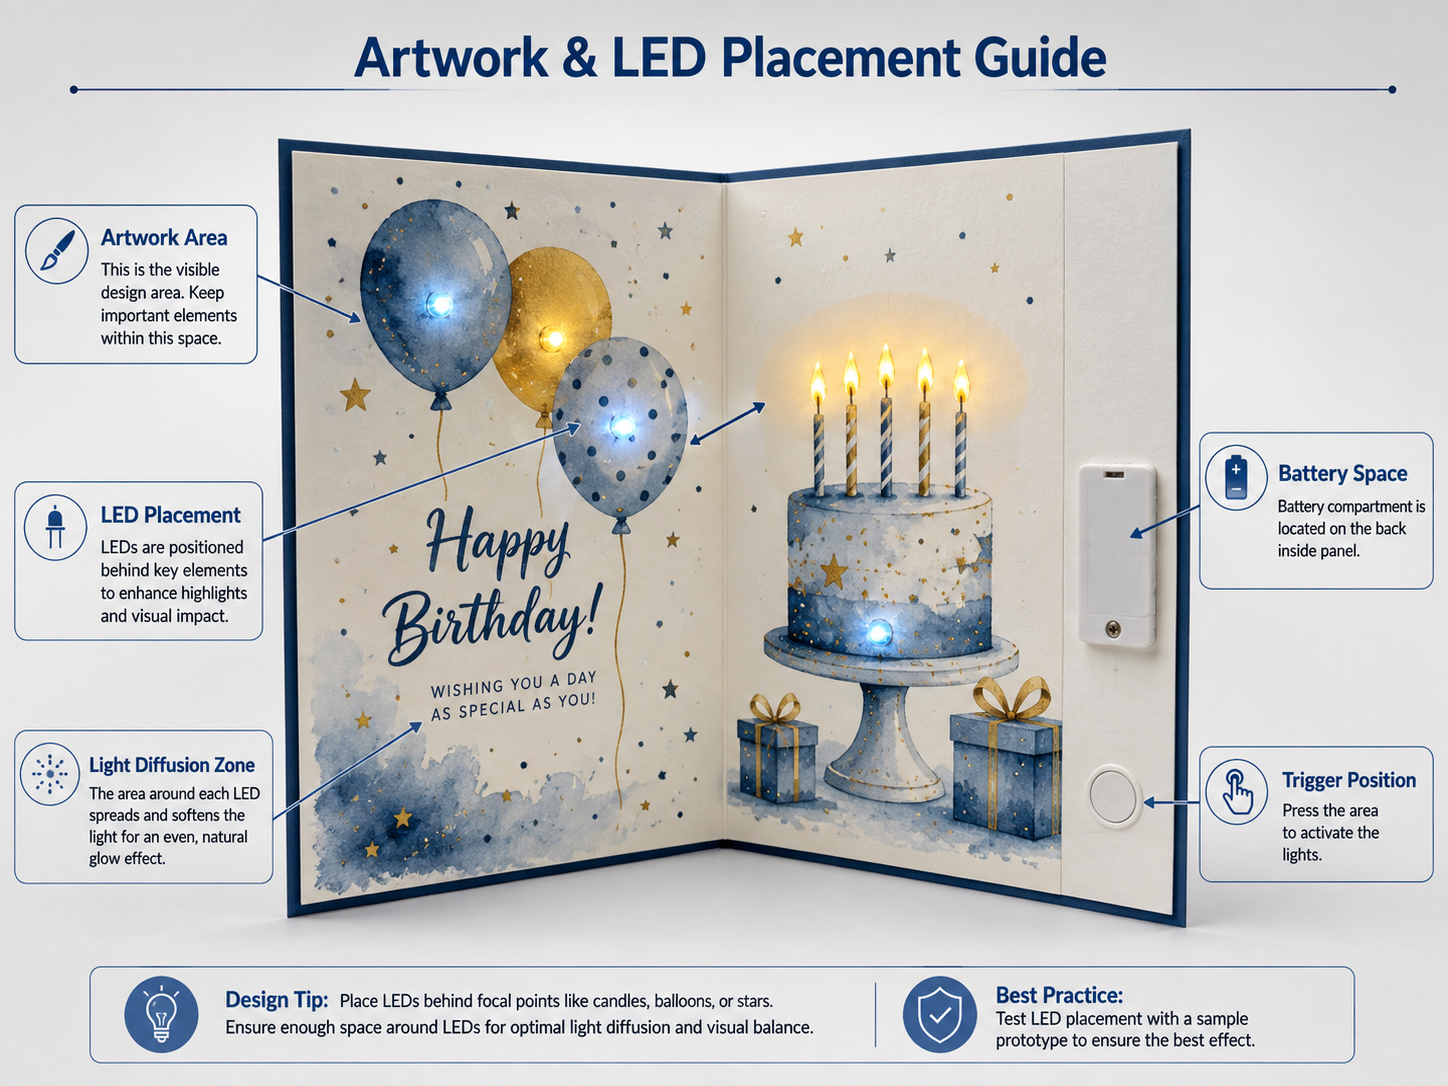
LED placement should be planned together with the printed design.
For example, if the artwork includes a night skyline, LEDs can be positioned behind windows or building outlines. If the design includes candles or stars, the light source can sit directly behind those focal points.
Important factors include:
- LED position
- Distance between LEDs
- Light color
- Brightness
- Printed ink density
- Paper thickness
- Diffusion material
- Space between the LED and printed surface
The same LED can look very different depending on the paper and printed area above it.
Testing a physical sample is therefore important before confirming mass production.
Control Light Diffusion
One common problem with light-up cards is an LED appearing as a strong single point instead of creating a smooth glow.
The card structure can use spacing or diffusion layers to soften the light.
A suitable design should consider:
- Distance between the LED and artwork
- Paper opacity
- Diffusion layer
- Internal cavity depth
- Surrounding printed color
Dark printed areas may require a different lighting arrangement from light-colored artwork.
The goal is to create a controlled visual effect without making the internal electronics obvious from the outside.
Choose the Right Trigger Method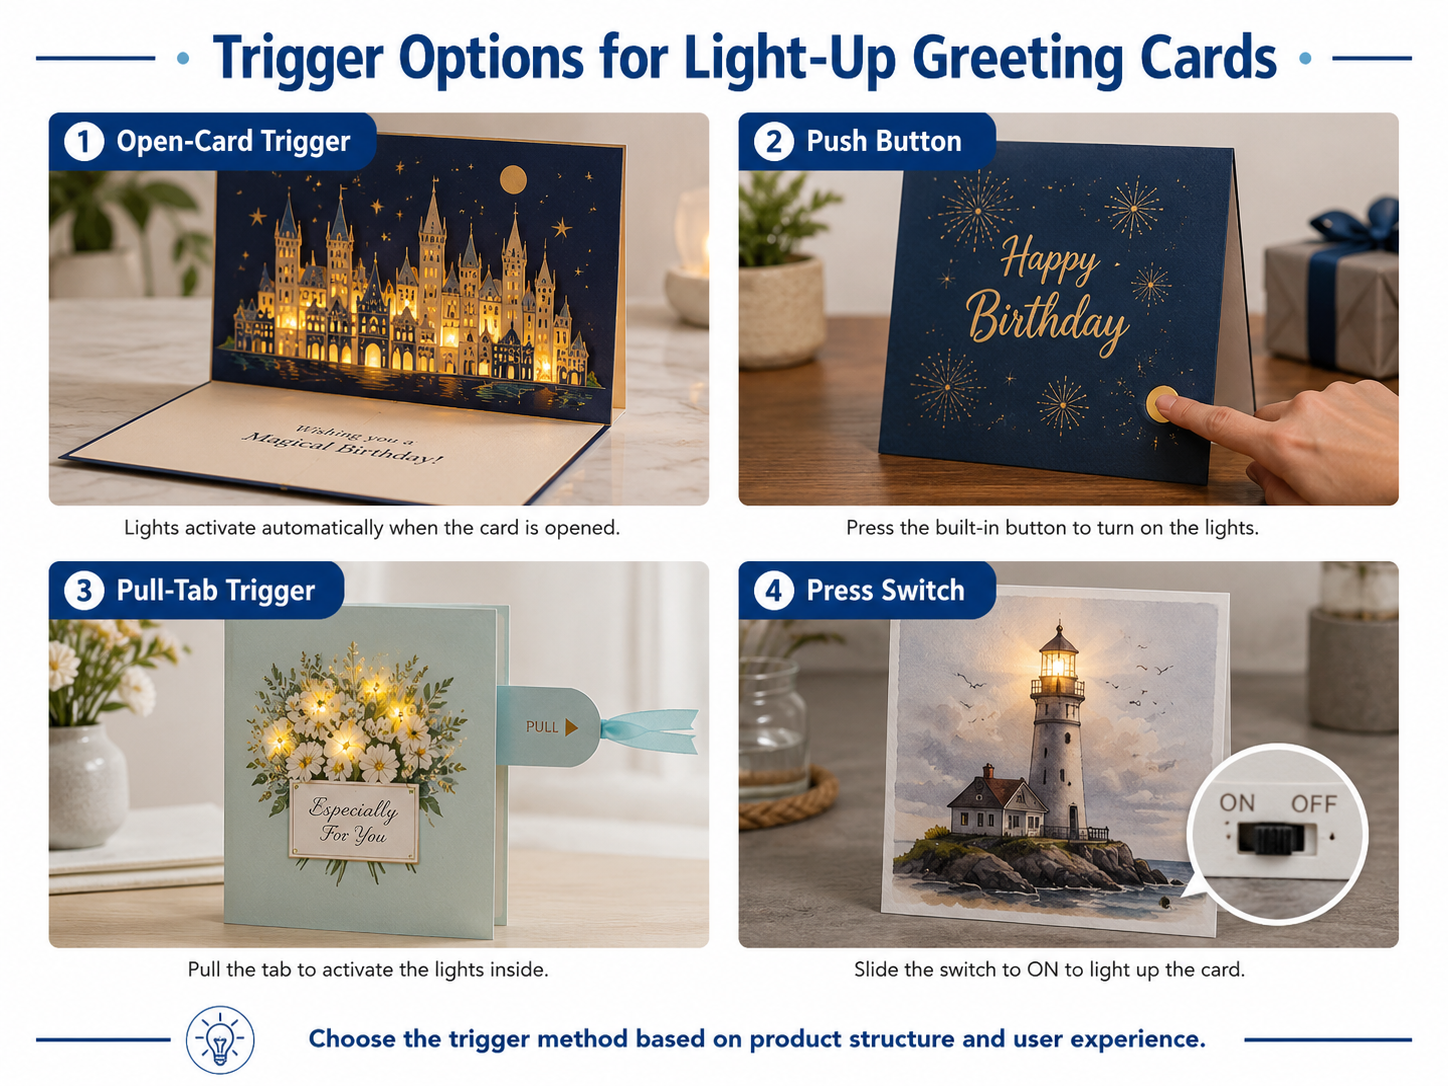
The trigger determines when and how the lighting starts.
Different card structures may use different activation methods.
Open-Card Trigger
The lights activate when the card is opened.
This works well when the lighting should become part of the reveal experience. It is suitable for greeting cards, invitations and presentation pieces where the opening action is part of the interaction.
Push Button
A visible or hidden button allows the recipient to activate the lighting manually.
This option gives the user more control and can be useful when the card may remain open for a longer time.
Pull-Tab Trigger
The recipient pulls a tab to activate the lighting.
This creates a simple interactive action and may be suitable for direct-mail pieces, promotional cards or packaging inserts.
Press Switch
A pressure-sensitive or mechanical switch can activate the lights when a specific area is pressed.
This can be integrated with printed instructions such as “Press Here” or incorporated into a specific part of the artwork.
The trigger method should be confirmed before the internal layout is finalized because it affects wiring, component position and card thickness.
Leave Enough Space for the Battery and Electronics
The internal electronic system requires more space than the visible LED points alone.
A light-up card may include:
- LEDs
- PCB or control module
- Battery
- Trigger switch
- Wiring
- Connection points
The available internal area should be confirmed before the artwork and card thickness are finalized.
For thinner card structures, component placement becomes especially important. A battery or switch positioned incorrectly may create visible bumps or interfere with folding.
Valsen’s product range includes light-up cards, LED light kits, sound-and-light cards and related electronic modules. Exact battery type, LED quantity, trigger method and internal configuration should be confirmed according to the specific project.
Keep Artwork and Electronics Aligned
The artwork file and electronic layout should be reviewed together.
Before sampling, confirm:
- Final artwork
- Card size
- LED positions
- LED color
- Trigger position
- Battery location
- Internal component area
- Folding line
- Printed message
- Lighting sequence
This helps avoid situations where an LED is hidden behind the wrong artwork area or where a button overlaps important printed content.
Test the Complete Sample
A light-up card should be tested as a complete finished product, not only as an electronic module.
The sample should be checked for:
- LED brightness
- Light consistency
- Trigger sensitivity
- Battery operation
- Folding performance
- Internal component visibility
- Artwork alignment
- Repeated activation
- Overall card thickness
- Final visual effect
If several LEDs are used, check whether the brightness looks balanced across the full design.
The final approval should be based on both appearance and operation.
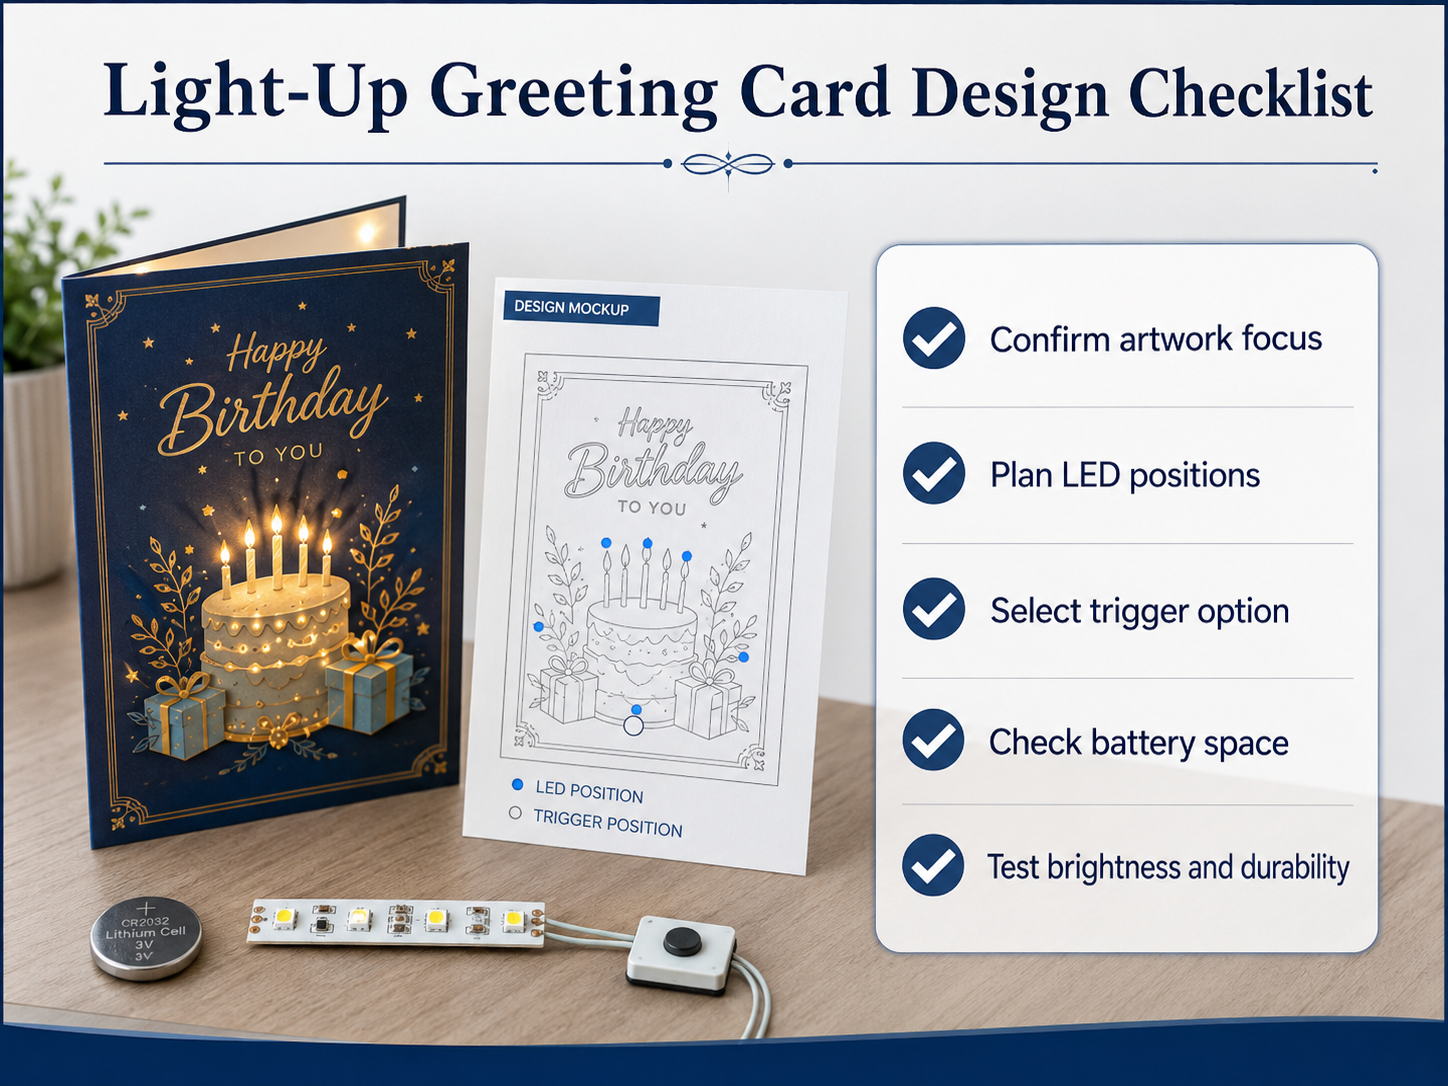 Practical Design Checklist
Before requesting a quotation or sample, prepare:
- Final or draft artwork
- Card dimensions
- Required LED areas
- Preferred light color
- Trigger method
- Expected lighting effect
- Battery preference if known
- Required quantity
- Delivery destination
- Sample requirements
The more complete the design brief is, the easier it is to evaluate the card structure and electronic layout.
Final Recommendation
A strong light-up greeting card combines artwork and electronics into one coordinated design.
Start with the visual focus, position LEDs behind meaningful artwork, select a trigger that matches the user experience and reserve enough internal space for the battery and wiring.
Most importantly, test the complete card before mass production rather than evaluating the lighting components separately.
Share your artwork concept, lighting area and trigger preference for an initial feasibility review.
FAQ
How many LEDs should a light-up greeting card use?
There is no single correct number. The quantity should depend on the artwork, card size and desired visual effect.
Can LEDs be placed behind printed artwork?
Yes. LED placement can be coordinated with printed elements such as stars, windows, candles or logos, but the paper and diffusion structure should be tested.
Which trigger method is best for a light-up card?
It depends on the interaction. Open-card triggers work well for reveal moments, while push buttons, pull tabs and press switches provide more direct user control.
Why is a sample important?
A physical sample allows buyers to check brightness, diffusion, component placement, trigger operation and the relationship between the LEDs and printed artwork.